
Gender reveal parties rank among today’s most exciting celebrations for expecting parents. These parties feature gender reveal cupcakes as a delightful way to share the joyful news.
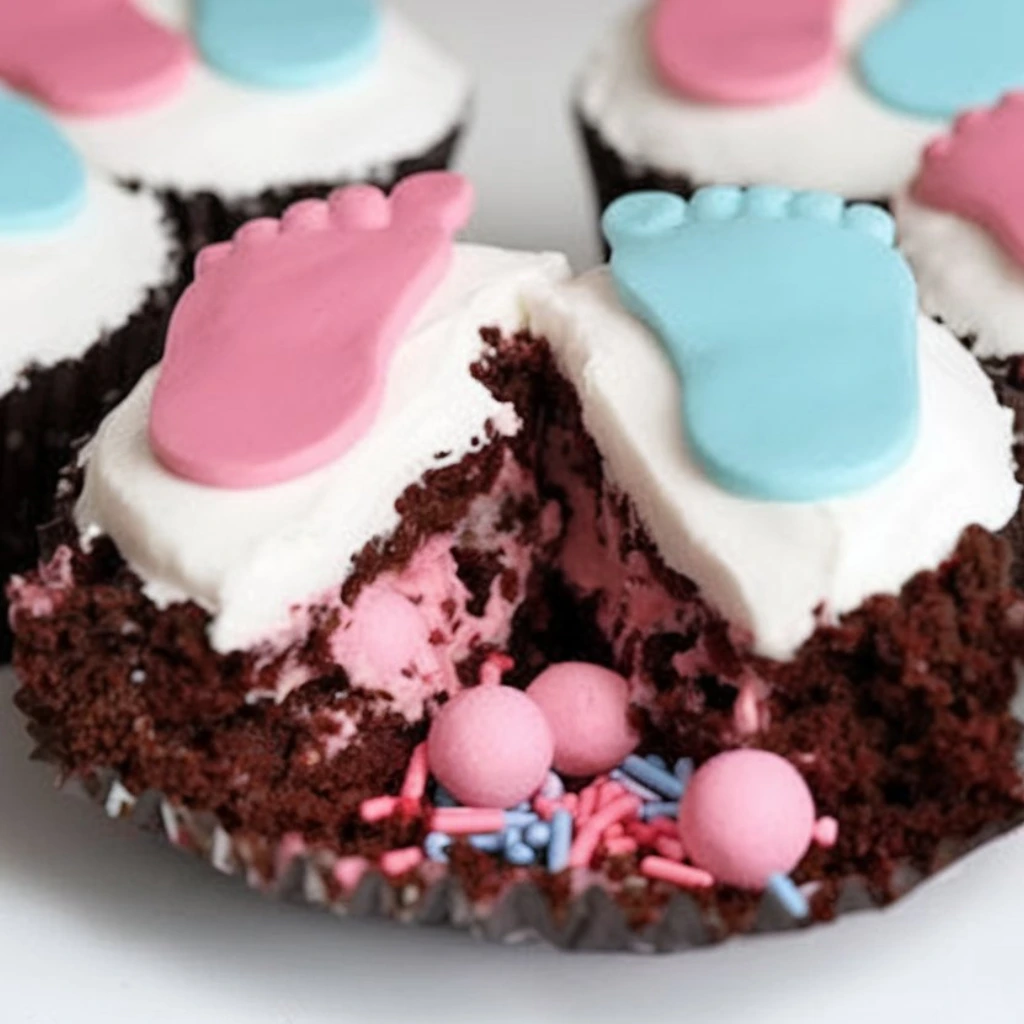
The special treats hold a sweet secret – pink or blue frosting tucked beneath their simple exterior. Each guest experiences a magical moment that ever spread joy through a single bite. Our foolproof recipe yields 15 picture-perfect cupcakes in just 50 minutes, making it perfect to plan your celebration or help a friend’s special moment.
These cupcakes should look stunning and taste amazing. The recipe guides you to create the perfect dense-yet-soft cake base and become skilled at the colored filling technique. Your guests will love these memorable treats that bring smiles to everyone’s faces.
What You Need to Make Gender Reveal Cupcakes
Perfect gender reveal cupcakes need the right tools and ingredients to create that magical moment of color revelation. These special treats differ from regular cupcakes because they require specific equipment and components. Here’s what you’ll need to get started.
Simple Tools and Equipment
Your success with gender reveal cupcakes starts with proper baking equipment. You’ll need standard muffin tins—two 12-cup tins work best for most occasions. Sturdy nonstick metal pans that have rolled edges give you even baking results.
These tools will help you create perfect cupcakes:
- Measuring Tools: A set of dry measuring cups, liquid measuring cups (preferably with pouring spouts), and measuring spoons to measure ingredients accurately
- Mixing Bowls: A set of three bowls in small, medium, and large sizes—deep stainless steel or glass bowls work best
- Cupcake Liners: These help cupcakes release from the tins while adding decorative flair
- Cooling Rack: Air circulation helps cool cupcakes quickly and preserves texture
- Whisk and Wooden Spoon: Hand mixing of ingredients
- Electric Mixer: Either a hand-held mixer or a stand mixer that creams butter and sugar quickly
The special “reveal” element requires:
- Cupcake Corer or Melon Baller: This tool is a vital part of scooping out cupcake centers to create space for the colored filling
- Piping Bags and Tips: You’ll need these to fill cupcakes and create decorative frosting
- Offset Spatula: A small (3-4 inch) spatula makes spreading fillings and swirling frostings easier
- Food Coloring: Gel food coloring gives more vibrant colors than liquid versions

Essential Ingredients for Cupcakes and Frosting
The cupcake base needs ingredients that create a sturdy yet tender texture, ideal for your colored filling. Most recipes call for:
- Flour: All-purpose flour provides structure (approximately 1½-2⅓ cups depending on recipe)
- Sugar: Typically, 1 cup of granulated sugar sweetens and helps with browning[63]
- Leavening Agents: Baking powder (1 tablespoon) and baking soda (½ teaspoon) help cupcakes rise
- Fats: Butter (¼-½ cup) and/or vegetable oil (¼-½ cup) add moisture and texture
- Eggs: Usually 2-3 large eggs or just egg whites give a lighter texture
- Milk: About ½-1½ cups, some recipes specify buttermilk or whole milk[64]
- Flavorings: Vanilla extract (1-2 teaspoons) adds a classic taste
Your colored filling needs:
- Base Component: Choose buttercream frosting, colored whipped cream, or marshmallow cream
- Food Coloring: Pink/red (for girls) or blue (for boys) gel food coloring
The outer frosting combines:
- Butter: 1-2 cups at room temperature
- Powdered Sugar: 3-4 cups give sweetness and structure
- Vanilla Extract: 1-2 teaspoons add flavor
- Heavy Cream or Milk: 1-2 tablespoons, adjust consistency
Gathering these tools and ingredients before you start ensures a smooth baking experience. Your gender reveal cupcakes will turn out picture-perfect every time.
Step 1: Bake the Cupcakes
The baking process is the foundation of great gender reveal cupcakes. You need to pay attention to recipe choice and technique since these treats must keep their colorful surprise intact without breaking apart.
Choosing the right cupcake base
Gender reveal cupcakes need to be sturdier and denser than regular ones. A light or delicate cupcake might crumble when you core and fill it, which ruins the surprise. A white cake base works best – it should be sturdy enough to carve but still tender to eat.
Here are your best recipe options:
- Boxed cake mix: Beginners will find a moist white cake mix (like Betty Crocker SuperMoist) really convenient and reliable. Just mix it with water, eggs, and vegetable oil for quick results.
- From-scratch vanilla cupcakes: These give you better control over texture. Adding sour cream or Greek yogurt creates denser, moister cupcakes that stay intact while filling.
- White chocolate cupcakes: The melted white chocolate in your batter creates a tender yet sturdy crumb that’s perfect for the core.
The best gender reveal cupcakes have a tight crumb that stays together when bitten. Look for recipes using whole eggs instead of just whites (unless needed for color) because egg yolks add richness and help the cake stay together.

Tips for even baking and texture
Even consistent cupcakes are vital to your success. These techniques will help you get professional results:
Prepare your ingredients the right way. Room temperature ingredients are a must – they blend better and create a smooth batter. Cold eggs or milk can make your batter separate and bake unevenly. You can speed this up by cutting the butter into small pieces and placing the eggs in warm water.
Mix just right. Too much mixing makes the gluten active and leaves you with tough, chewy cupcakes. Mix only until ingredients combine when adding flour. These cupcakes need to be slightly denser, so beat the batter a bit less than you would for regular ones.
Fill those liners properly. The rule of thumb is to fill cupcake liners 2/3 full – never more than 3/4. This lets cupcakes rise without spilling over. An ice cream scoop helps portion the batter evenly.
Create the perfect baking setup. Put the rack in your oven’s center and bake one tray at a time if possible. Make sure to preheat and check the temperature with an oven thermometer – wrong temperatures are why most cupcakes fail.
Check doneness the right way. Time isn’t enough – use the bounce-back test. Press the cupcake’s center gently with your finger. It’s done if it springs back fully. Keep baking if it leaves a dent. Slightly underbaked beats dry since cupcakes keep cooking after you take them out.
Let the cupcakes cool in the pan for about 5 minutes, then move them to a wire rack until they’re completely cool before filling. Some bakers prefer freezing them first to make coring and filling easier.
Step 2: Prepare the Filling
The filling makes any gender reveal cupcake special. This vital component creates that magical moment when guests find out if the baby is a boy or a girl. Your reveal becomes truly memorable when the perfect filling looks striking and tastes amazing.
Using colored frosting or sprinkles
Gender reveal cupcake fillings come in two main types: colored frosting or sprinkles. Each option gives you different benefits based on your baking skills and the look you want.
Buttercream frosting stands out as the top choice for gender reveal fillings because it takes color well and tastes delicious. Here’s how to make this classic filling:
- Remove approximately 2/3 cup of prepared buttercream to a small mixing bowl
- Add your chosen food coloring (pink/red for girls, blue for boys)
- Mix with a wooden spoon until the color blends completely
- Transfer the colored buttercream to a piping bag fitted with a narrow tip attachment
You might want something different than buttercream. Here are some creative options:
- Whipped cream mixture: Combine heavy whipping cream with cheesecake-flavored pudding mix, then add jam (strawberry for girls, blackberry for boys) and matching food coloring
- Sprinkles filling: Pour pink or blue sprinkles right into the cored cupcake centers for an exciting reveal
- White chocolate ganache: Add food coloring to create a luxurious, flowing center when bitten into
- Pastry cream (crème pâtissière): This vanilla custard-like filling takes color easily and gives a tasty surprise
How to get the perfect color tone
Getting the right color intensity matters a lot for gender reveal cupcakes. No one wants guests wondering if they’re seeing pink or red!
Gel food coloring works better than liquid ones for buttercream fillings. Start with a small amount of color and add more until you see that clear pink or blue shade. Keep in mind that buttercream gets slightly darker as it sets.
Adding jam first to whipped cream fillings creates a natural color base before you put in food coloring. You’ll need less artificial coloring this way. Cold cream, bowl, and beaters will help your mixture keep its color and texture.
Choose sprinkle mixes made just for gender reveals if you’re using sprinkles. These come with focused color palettes without extra colors getting in the way. High-quality sprinkle brands like SprinklePop look better and taste good, too, making your cupcakes even more special.
Store your filling properly once it’s ready. Colored buttercream stays fine at room temperature during assembly. Whipped cream fillings need to stay in the fridge until just before filling to keep their structure and color bright.
Step 3: Fill and Seal the Cupcakes
The most exciting part of making gender reveal cupcakes is putting together the cake and colorful filling to create that magical reveal moment. You need to be precise to keep your surprise hidden until the big bite.
How to core cupcakes without a corer
A cupcake corer makes the job easier, but you can use many household items that work just as well. Here are some foolproof options:
A small serrated knife gives you excellent precision. Cut a 1-inch circle about halfway into your cupcake at a 45-degree angle to create a cone-shaped plug. This method lets you control the size and depth of your cavity. Remember to leave some cake at the bottom so nothing leaks through.
You can use a large piping tip turned upside down. The wider end should go into the cupcake’s center with a gentle twist while pushing down. Your reward is a perfectly round hole that takes minimal effort. A standard 1M decorating tip does the job beautifully.
A melon baller quickly creates uniform cavities. Push it halfway into the cupcake’s center, give it a slight twist, and lift out. This tool works best when your cupcakes have chilled in the fridge for 30 minutes because they become firmer and less crumbly.
An apple corer is another kitchen tool that produces consistent results. Place it in the center of your cupcake and push down halfway, rotate it gently, then pull up to remove the core.
Replacing the top for a smooth look
Creating that perfect seal is a vital step after filling your cupcakes with colored frosting or sprinkles. Take your removed plug or “lid” and trim about ¼-inch from the bottom, keeping just the top surface. This thinner cap fits nicely over your filling without pushing it out.
Place this trimmed piece carefully on top of your filled cavity. Press it down lightly until it sits even with the cupcake’s surface. Now you have a flat base for your final frosting layer while your colorful surprise stays completely hidden.
Fill sprinkle-filled cupcakes until they’re level with the cupcake’s top before adding the cap. For frosting fillings, leave about a ¼-inch space at the top so the lid fits without overflow.
Your gender reveal cupcakes are ready for their final decorative frosting layer once they’re sealed. This last touch will hide what’s underneath and keep that magical moment of discovery a true surprise for everyone.
Step 4: Frost and Decorate
Your gender reveal cupcakes need a frosting layer that acts as the grand finale and clever disguise. The right decorating techniques will help beginners create professional-looking treats that keep the surprise hidden until the big moment.
Simple piping techniques for beginners
Beautiful frosted cupcakes don’t need years of practice. A stiff buttercream that holds its shape will work best—mix butter, powdered sugar, vanilla extract, and a touch of cream. Fill your piping bag halfway and twist the end closed to start decorating.
The classic swirl remains the most versatile technique. You’ll need a large star tip like the Wilton 1M or Ateco 844. Hold the bag perpendicular to the cupcake with the tip about half an inch above the center. Apply even pressure as you move in a circular motion:
- Create a small dollop in the center
- Move outward in a complete circle around the edge
- Make a second circle that slightly overlaps the first
- Complete with a third circle and release pressure while pulling upward
You can also create a simple rosette by starting in the center and spiraling outward. A large, round tip like Ateco 808 helps create smooth, cloud-like domes that hide everything underneath.
Let go of the pressure before lifting the bag to avoid those pesky frosting “tails” that can spoil your presentation.
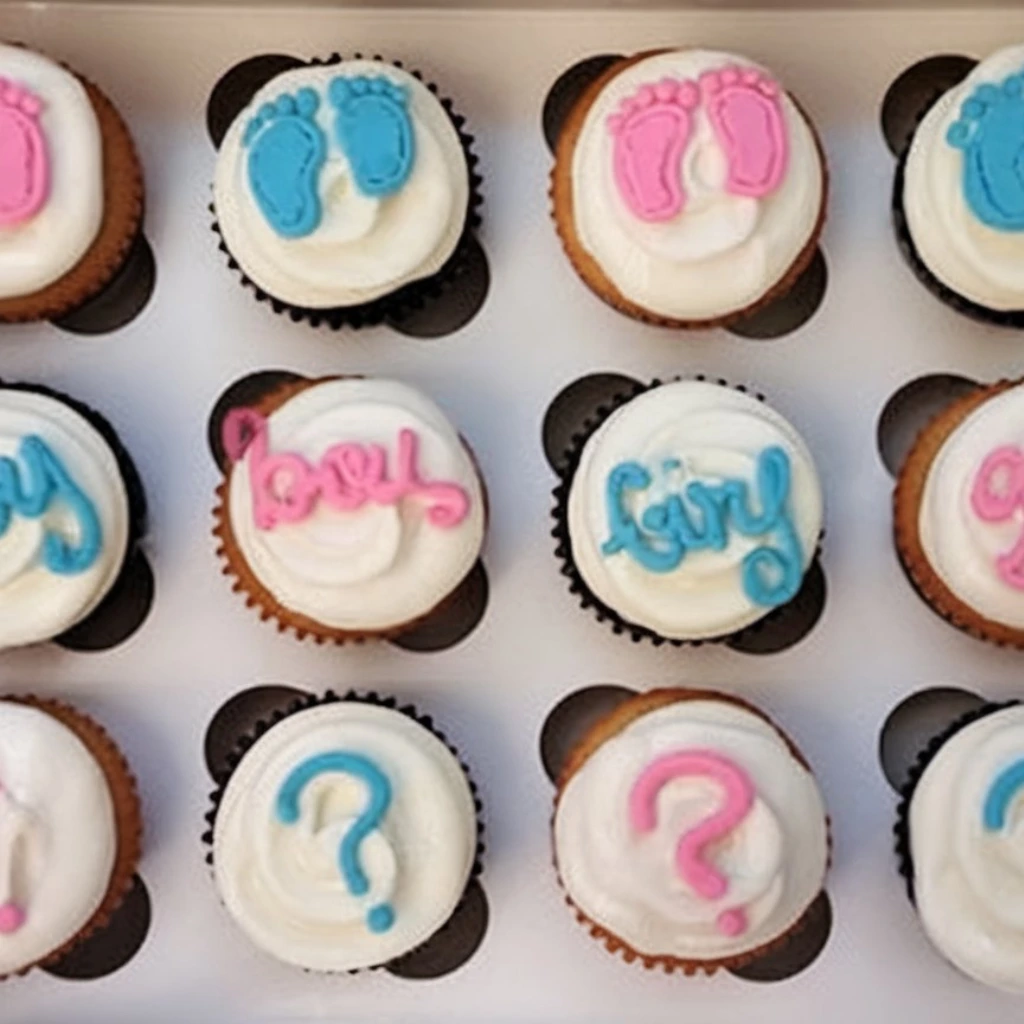
Ideas for gender-neutral decorations
Your cupcake decorations must stay completely gender-neutral to keep the surprise. Many bakers use dual-colored frosting. Draw a thin line of pink food coloring on one inside wall of your piping bag and blue on the opposite side. White frosting goes in next—just don’t disturb the colored lines. This creates a beautiful swirl with both colors.
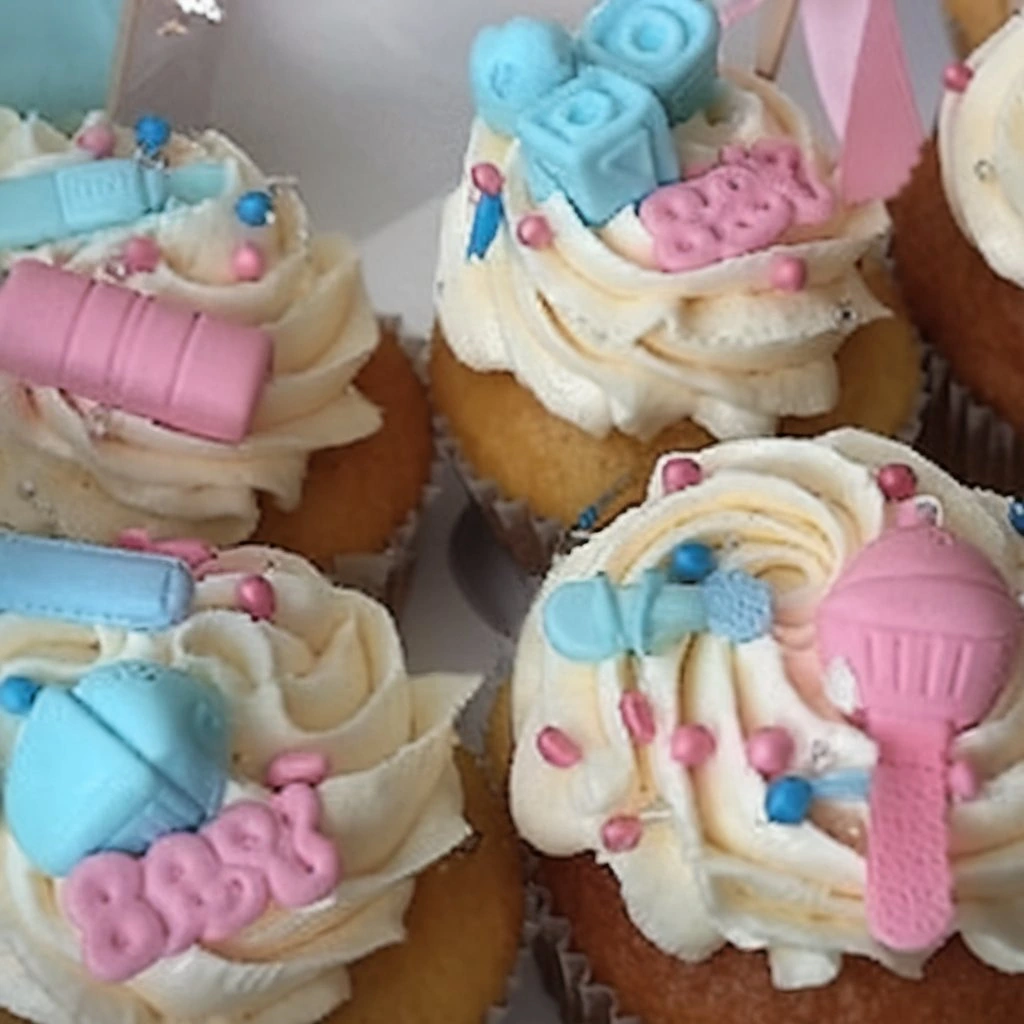
Gender-neutral decorative elements can include:
- Question mark toppers or “boy or girl?” flags
- White chocolate is drizzled with gold or silver accents
- Green and yellow sprinkles (traditionally neutral baby colors)
- Eucalyptus or greenery-themed decorations that trend at baby showers
- Minimalist designs with brown bear motifs or neutral balloons
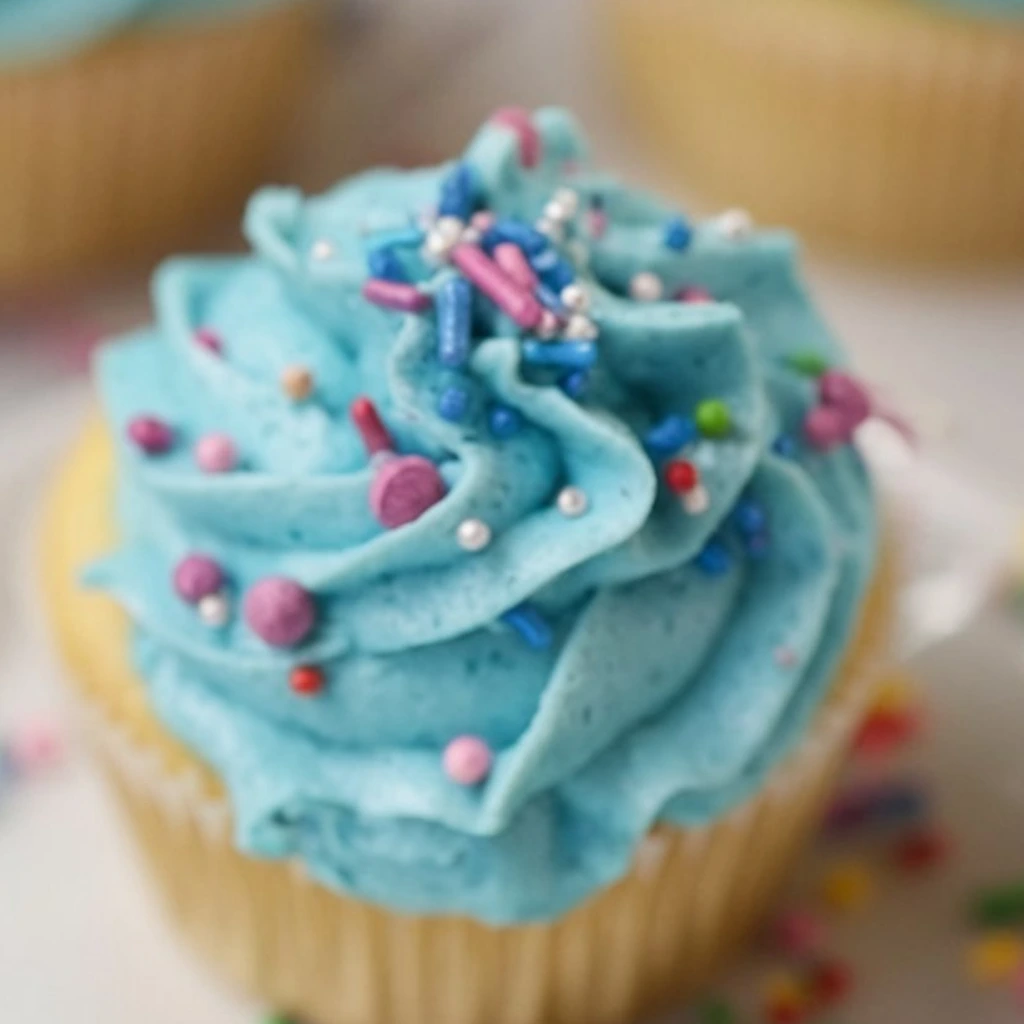
Swiss meringue buttercream offers an elegant alternative to standard American buttercream. This option pipes beautifully and creates a smooth finish, perfect for capturing those Instagram-worthy gender reveal photos.
Conclusion
Gender reveal cupcakes are a great way to share your exciting news with family and friends. These special treats create an unforgettable moment with their perfect mix of sturdy cake base, vibrant filling, and beautiful decorations.
Your success will come from careful preparation and attention to detail. The right tools and ingredients, proper baking techniques, and mastering the filling process will give a perfect, magical reveal moment.
Practice makes perfect – that’s a fact. My cupcake attempts weren’t flawless at first, but each batch taught me something new. You shouldn’t feel discouraged if your original tries aren’t picture-perfect. Just focus on creating a sturdy cake, getting the right color intensity, and keeping that surprise element with neutral decorations.
These simple steps will help you create beautiful gender reveal cupcakes that look stunning and taste amazing. Your guests will love both the suspense and the delicious treat waiting inside.
FAQs
Q1. What are some popular dessert options for a gender reveal party? Gender reveal parties offer various dessert options, including cakes, cookies, cupcakes, cake pops, cheesecake bites, chocolate-covered pretzels, and cotton candy. You can also set up themed bars like hot chocolate or sundae stations for a fun, interactive experience.
Q2. How far in advance can I prepare cupcakes for an event? You can bake cupcakes up to two days before your event. Store unfrosted cupcakes at room temperature, wrapped in plastic wrap. For longer storage, you can freeze unfrosted cupcakes by wrapping them securely in plastic wrap and foil.
Q3. What’s the key to making super moist cupcakes? To achieve super moist cupcakes, use cake flour for a softer texture, incorporate sour cream or yogurt for richness, and use whole milk or buttermilk for added moisture and flavor. These ingredients help create a tender and moist cupcake texture.
Q4. How do I add colored filling to cupcakes? To add colored filling, prepare frosting and mix in food coloring to achieve the desired shade. Create a cavity in the cupcake using a knife, piping tip, or apple corer. Fill the center with the colored frosting using a piping bag or butter knife, then seal with the removed cake piece.
Q5. What are some gender-neutral decoration ideas for reveal cupcakes? For gender-neutral decorations, consider using dual-colored frosting swirls, question mark toppers, white chocolate drizzles with gold or silver accents, green and yellow sprinkles, or nature-themed elements like eucalyptus. You can also opt for minimalist designs featuring neutral motifs such as teddy bears or balloons.